Games Marketplace - Odealo
0.00 25 (Click on the icon to view details)

Articles

Tarkov Beginner's Guide - How to start playing EFT

Tarkov Beginner's Guide - How to start playing EFT

Most comprehensive Beginner's Guide for Escape from Tarkov

Escape from Tarkov
Ultimate Beginner's Guide

Settings, Controls, Stash, Hideout, Traders, Bartering, Health System, Meds, Ammo, Weapon Modding, Gear, and more


Introduction

Escape from Tarkov is not a beginner-friendly game, it is not a friendly game at all, in fact. After watching some videos and reading a few articles, you might expect a rough start, but you most likely don't realize HOW rough. This is why we have decided to compile all the information, that is important from the beginner's perspective, and share it with you. This will be a long read, but there is A LOT to learn and comprehend... 


Settings

Graphics

Finding a good balance between the looks and the performance is essential if you want Tarkov to run at high FPS values and still look good. Here is a short explanation of all graphics settings available in the game, together with some recommendations that should help you find an optimal configuration.

Note: If you want to know more about these settings and about how they affect performance, check out our comprehensive EfT Graphics Settings guide, HERE

Resolution

Resolution is the number of distinct pixels, that can be displayed on a monitor, in each dimension. 

Our Recommendation: This should be always set to your monitor's native value. 

Aspect Ratio

The Aspect Ratio is a proportion of the displayed image's width to its height.  

Our Recommendation: This should be always set to your monitor's native value. 

Screen Mode

There are three Screen Modes available in Tarkov; Fullscreen, Windowed, and Windowed Borderless. The latter option is "the best of both worlds" as it offers almost as much freedom as Windowed mode while also taking up full screen which allows you to focus on the game.  

Our Recommendation: Windowed Borderless, unless you have severe performance issues with the game. 

VSync

VSync synchronizes the frame rate of a game with your monitor's refresh rate to prevent screen tearing, but it may cause input lag or, in more extreme cases, cap your FPS at a very low value.

Our Recommendation: Turn it off, it causes more problems than it solves. 

Overall Graphics Quality

This gives you a bunch of graphics presets that allow you to easily match the game's graphics settings to your PC's capabilities.  

Our Recommendation: No real need to fiddle with this, as you will adjust every single setting manually anyway. If you want to adjust Graphics quickly, then match this with your PC's strength. 

Texture Quality

This changes the resolution of the game's textures. The difference is seen mainly when you are very close to an object (like a brick wall, for example); Low Texture Quality can make the game look bad in confined spaces. 

Our Recommendation: Put this on High, unless you want to squeeze that few extra FPS at the cost of greatly decreasing the graphical fidelity of the game. 

Shadows Quality

Lowering this setting will make shadows look less sharp and fuzzy. The smaller and more complicated the shadow, the more difference will this setting make when changed from Low to High.  

Our Recommendation: Put this on Low for the best performance, unless your graphics card can handle it. 

Object LOD Quality

This determines how the complexity, resolution, and quality of 3D models change with their distance to the player. Object LOD Quality improves rendering efficiency by decreasing the strain that the game's graphics put on the GPU - take advantage of this.  

Our Recommendation: Put this on 2, which is the lowest possible - it will give you up to 20 extra frames. 

Overall Visibility

This determines the distance at which objects, players, and terrain features start to render on your screen. Increasing your Overall Visibility will force your PC to render objects (and Players) that are really far away. This is not as good as it sounds as maps aren't flat and you can't see through terrain and buildings. 

Our Recommendation: Set this to 400 and increase to 1000 for very open maps if your PC can handle it. Even when you're sniping, you most likely won't engage people that are further away than 400 meters. 

Shadows Visibility

This determines at what distance shadows cast by objects, players, and terrain features start to disappear. Increasing this boosts the game's immersion, but the performance cost is pretty high.  

Our Recommendation: Set this to 40 (minimum value) to increase your framerate by a bit. Most of the time, you don't focus on objects that are more than 40 meters from you, so you will not notice the lack of shadows. 

Antialiasing

This setting determines how well the jagged edges (caused bt the fact that pixels are square in shape) on rendered objects are smoothed out.  

Our Recommendation: Put this on FXAA as it actually increases your framerate when compared to having this turned on (Tarkov's graphics for you... this effect is most likely caused by the number of sharp edges on the grass). 

Resampling

This setting changes the resolution of 3D textures depending on their distance to the actor. Supersampling increases the number of pixels and Downsampling reduces it.  Resampling has the highest performance impact of all Tarkov's graphics settings. 

Our Recommendation: Put this to "1x off"; even the strongest graphics cards will struggle with 4x supersampling (expect to lose over 50 FPS... really). 

HBAO

This is is a rendering and shading technology used in ambient lighting calculations. It determines how rendered objects are exposed to ambient lighting (HBAO stands for Horizon-Based Ambient Occlusion). This, basically, makes dark areas look even darker. 

Our Recommendation: Turn this off, as it may substantially decrease your framerate in dark, enclosed areas (and it will make spotting enemies in such areas harder). 

SSR

This is q post-processing technology that utilizes screen space data to calculate reflections. Thanks to SSR, you can see object reflections in puddles of water and other reflective objects (SSR calculates reflections in a way that stimulates the real-life image).  

Our Recommendation: Turn this off to increase performance, unless you notice the lack of reflections and it disturbs you. 

Anisotropic Filtering

This setting enhances the image quality of textures, on 3D-rendered objects, that are slanted with respect to the player's view (so, not directly in front of the player)  where the projection of the texture appears to be non-orthogonal.  Without this, textures viewed at different angles might lose their proportions (distant objects, viewed at oblique angles, will appear visibly skewed, blurry, and somewhat flat). Anisotropic Filtering has a great impact on Tarkov's looks, but it does not impact the performance that much. 

Our Recommendation: Turn this on, without it, the game looks bad. 

Sharpness

Increasing Sharpness makes all objects stand out more against each other while reducing it results in images becoming more blurry (Sharpness increases the contrast of all objects' edges). Some players state that high Sharpness makes spotting enemies easier. 

Our Recommendation: It has close to no impact on performance, so it's up to you. We recommend something around 1.7 Sharpness as higher values might cause your eyes to tire. 

Lobby FPS Limit

Rather self-explanatory. This does not have any direct impact on the game's in-Raid FPS, but decreasing it might allow your PC to cool down a bit more between raids and help you indirectly (it will heat up in Raid very fast anyway; if you have overheating problems, think about getting a better PC case or an additional fan).  

Our Recommendation: Set this to 60; it makes the game feel a bit smoother when you fiddle with your stash. 

Game FPS Limit

A bit less trivial than the "Lobby FPS Limit"; You can rise this up to 120, but it does not guarantee that the game will run at that value; the actual amount of FPS depends on other settings and your PC's specs.

Our Recommendation: Set this to 120, unless you run the game on a Low-End PC and worry that it might overheat on a rare occasion when it reaches high FPS. 

Z-Blur

This feature will blur images on your screen while you sprint or quickly turn to increase immersion (rapid movements make focusing your eyes on objects difficult and Z-Blur tries to simulate that). This can make spotting enemies while turning or sprinting much more difficult and thus is rather detrimental. 

Our Recommendation: Turn this off as it does not make any real difference and may put you on a disadvantage in the extreme cases. 

Chromatic Aberrations

In optics, Chromatic Aberration is defined as a failure of a lens to focus all colors at the same point. This setting simulates this effect by making objects, at the corners of your screen, look out of focus. In photography, Chromatic Aberrations are, in most cases, seen as unwanted artifacts that greatly reduce image quality and are often removed in image post-processing. In Tarkov, this makes your character's vision a bit more "realistic" (human eyes have a field of vision of about 120°, but they can focus on just 30° and the rest appears blurry). 

Our Recommendation: Turn this off as it might put you at a disadvantage. 

Noise

This setting simulates the Film Grain, which is a result of the presence of small metallic silver particles or dye clouds (which break up from silver halide which is a chemical used commonly in photographic film and paper) and manifests as random optical textures (grain effect).  

Our Recommendation: Turn this off, unless you want that classic cinematic feel during gameplay. 

Grass Shadows

Self-explanatory; this adds shadows to the grass. This is not very noticeable, most of the time; unless you go prone in high grass.  

Our Recommendation: Turn this off to increase your FPS by a bit. You will not notice the difference unless you go prone in high grass (in which case Grass Shadows will make spotting enemies more difficult). 

Movement, Stances, and Chosen Controls/Key Binds

Some controls options, present in Escape from Tarkov, are rarely seen in other games. The game puts emphasis on realistic gameplay and a classic HUD is replaced by other mechanics because of that. This might cause some confusion for new players (how do I check how much ammo I have left?!). Learning all the hotkeys and remembering what they do is essential if you want to get better at the game.

Tip: Remember to rebind your in-game controls so that they feel more familiar right from the start. This will speed up the learning process; there's quite a lot to learn when it comes to controlling your Character in Tarkov. 

Note: We have decided to feature only the more unusual controls here; this is why, for example, movement-related ones are missing (they are pretty standard, and featuring them would just make the list harder to read as a whole). 

Movement

If you are used to the movement model from arcade First Person Shooters, like Counter Strike, you might be surprised by the complexity of Tarkov's system. In EfT, every possible move-related action is designed to simulate real-life, and things like encumbrance and lack of comfort caused by wearing heavy armor are taken into account. If you want to cosplay as a walking tank, don't expect to move anywhere near as fast, or as smooth, as someone using a light loadout. While most of FPS games constrict your movement options to sprinting, running, walking, and "sneaking" (with all of these movement options having pre-designated moving speeds), Tarkov lets you freely adjust your speed by scrolling your Mousewheel. Movement-related actions, your character can take, can be broken down into 5 categories:

  • Sprinting - The fastest and the noisiest way of moving around in Tarkov. Sprinting depletes your stamina (encumbrance and type of armor you wear affects this) and makes your steps very loud (so it might compromise your position). Try to use Sprint strategically and treat your Stamina as a valuable resource, because without it you won't be able to effectively engage enemies or even perform certain moves. Important: Armors often affect (lower) your Sprinting speed. 
  • Walking - The default movement option in EfT. It does not tire you and generates much less noise than sprinting, but you still can be heard. The Armor you're wearing affects your walking speed. 
  • Slow Walking - The slowest and the quietest walking pace. It allows you to sneak around without making too much noise and stops you from making sounds while traversing through the foliage. Moreover, Slow Walking will not generate surface-specific sounds (enemies will not be able to distinguish on what surface you're walking even if they hear you). It is done by pressing Caps Lock or scrolling your Mouse Wheel down. Important: Enemies can and will still hear you Slow Walking if they are close enough. 
  • Sidestepping - This movement option lets you move from side to side, which is handy while peeking corners and trying to dodge incoming fire (although, finding some cover is always better). You can Sidestep by pressing LAlt +Q(Left)/+E(Right); if you press and immediately release, your character will Sidestep in the chosen direction and immediately return to the starting position, if you hold the hotkeys, your character will Sidestep and hold his new position until you release them. 
  • Sliding - After you pick up enough speed while Sprinting, you can perform a slide by pressing LShift+C. This can be used to cross the last bit of open area before cover more safely, for example. The problem is that Sliding locks your character from input during the maneuver (so you can't change directions) and generates a loud noise. 

Stances

Tarkov offers three main Stances - Prone, Crouching, and Standing - each with its own advantages and disadvantages. Knowing how to utilize them to their full potential is a vital part of the game and combining them with the before-mentioned movement options is necessary if you want to survive in a Raid:

  • Prone - While lying on the ground, you can make use of very low cover, your accuracy is improved, and your silhouette is somewhat hard to notice, however, you can't move without making noise (your whole body touches the ground and makes "scraping" noises while you move), your movement options are greatly reduced, and you can't silently rise up. This stance is the least versatile, but it still has its uses. 
  • Crouching - The middle ground between lying prone and standing up. This Stance is the best of both worlds; it allows you to use cover effectively, improves your aim, and allows you to move very quietly, but also makes you slow. If you want to sneak somewhere, hide without limiting your movement options, or aim accurately - this is your best option. While Crouching, you can still adjust your overall movement speed, just like you would while Standing/Walking. 
  • Standing - The default Stance that allows you to move the quickest (including Sprinting), but it makes your silhouette clearly visible from a distance and your moves, performed in this stance, generate the most noise. While crossing open ground that does not feature any cover, this is your best option (just make sure you have enough stamina to sprint). 

Note: On top of the three pre-set stances, you are also able to smoothly adjust your posture with Mouse Scrool+ +C/Mouse Scroll- + C. This allows you to pick over obstacles of different heights and find a balance between the noise you make and the speed you move at. 

Chosen Controls/Key Binds
Switch Scopes By default: "RMB + LCtrl". If you have mounted 2 or more sets of Optics on your weapon or the Optic you use has backup sights, this key combination will allow you to cycle between them. 
Change Scope Magnification By default: "RMB + LAlt". Some long-range scopes have adjustable zoom, this allows you to use that feature. 
Check Time

By default: "O" (Press). Shows you how much time is left before the Raid ends.

Important: If you fail to extract from the Raid before the time ends, you will lose all items you've acquired during that Raid. 

Check Time and Exits

By default: "O" (Double Tap). On top of showing you low much time you have left before the Raid ends, this also shows you which extraction points are currently active. 

Important: It is a good idea to check this immediately after spawning (and maybe finding some cover first), as it will allow you to plan your advance into the Raid better. 

Toggle Tactical Device By default: "T" (Press). If you have a tactical flashlight or a laser mounted, this will turn them on. 
Switch Tactical Device Mode By default: "T + LCtrl" (Press). If you have a tactical device that has multiple modes, like X400 Tactical Flashlight which is a Flashlight+Laser combo), this command allows you to switch between the modes. 
Interact By default: "F". Pick things up, open doors, and other things like that - this will be the key you use the most. 
Throw Grenade By default: "G". Quickthrow Grenade; Nades are selected from left to right, from your Tactical Rig and Pockets. Grandes placed in your backpack can't be used without moving them first. 
Quick Reload Weapon By default: "R" (Double Tap). This is faster than the regular reload, but your character drops the ejected magazine on the ground (which is how the time is saved - don't forget to pick it up afterward). 
Next/Previous Magazine By default: "Mouse Scrool+ +R/Mouse Scroll- + R" (Hold R + Scroll). By default, magazines are chosen from left to right; this allows you to cycle between them. 
Check Ammo By default: "T + LAlt" (Press). This is how you check how much ammunition you have left in your gun. You will not get the exact number, but rather an estimation ("Full", "About Half", "Empty", and so on). 
Fire Mode  By default: "B" (Press). Many weapons have multiple firing modes, this allows you to switch between them. 
Check Fire Mode By default: "B + LAlt" (Press). If you don't remember which firing mode you have selected, this allows you to check it without switching modes. 
Check Chamber By default: "T + LShift" (Press). Self-explanatory - us this to make sure that you have a round chambered, so you are not surprised by a "click" when you expect the weapon to fire a shot. 
Increase/Decrease Movement Speed By default: "Mouse Scrool+ /Mouse Scroll-" This allows you to smoothly adjust your character's movement speed. 
Next/Previous Walk Pose

By default: "Mouse Scrool+ +C/Mouse Scroll- + C". In Tarkov, you can smoothly change your moving posture - this is how you toggle between them. 

Note: The faster you move (so, the more straightened you are), the more noise your steps make but also the faster you move. 

Lean Right/Lean Left By default:  "E/Q". Leaning allows you to pick corners without exposing your character's whole body to possible enemies. 
Smooth Lean Right/ Smooth Lean Left By default: "LAlt+D/LAlt+A" With this, you can adjust your "leaning angle" and pick just a bit or make a full lean. To reset your stance, use default Lean hotkeys (E/Q by default). 
Overhead Blind Fire By default: "W + LAlt". This allows you to blind-fire from behind a low cover. 
Right Side Blind Fire By default: "S + LAlt". This allows you to blind-fire around a right-side corner. 
Examine Weapon  By default: "L". Your character will take a closer look at the weapon he's holding; it might allow you to spot if something's missing (this is handy for checking weapons found on Scavs etc.). 
Fold Stock By default: "L + LAlt". Folding stock on a weapon that has this feature makes it take up less space in your backpack. However, shooting a weapon when it's stock is folded is a bad idea (you might find a weapon with a folded stock in-Raid; this is also how you unfold it). 
Mumble By default:  "Y" (Press). Makes your character mumble; any nearby Scavs will respond to you with a voice line. 
Inventory By default: "Tab". Self-explanatory. Remember to find some cover before fiddling with your inventory during a Raid. 
Scope Elevation Up/Down By default: "PgUp/PgDown" (Press). This allows you to adjust your optics for long-range firing (gravity, loss of velocity over distance, and some other things affect your bullets, so it's a good idea to apply some corrections if your scope has this option). 
Discard By default: "Del". If you want to quickly drop something, this is how you do it. 
Hold Breath By default: "LAlt". Holding Breath improves your aim (it reduces weapon sway), but doing it for too long will tire your character. 


Gear, Stash, and the Hideout

Firstly, your Character can carry a limited amount of stuff and your Stash is of a limited size. However, there are ways around that - tactical gear, like Vests and Backpacks, allows you to carry more items, while specialized containers allow you to store more goods in your stash. 

Gear

In Tarkov, there is no such thing as a pre-set loadout - in a Raid, you will have only the things you have brought to that Raid with you. Your Character has multiple "slots" that can be fitted with gear, these are: 

  • Earpiece - Here, you can equip various sound-enhancing equipment, like military headphones. Sence of hearing is extremely important in this game, so this should not be overlooked. 
  • Headwear - This slot is used mainly for Helmets, but other things, like Hats and Night Vision Googles, can also be worn. Headpieces other than protective helmets are not recommended - if you want Night Vision, there are helmets with special mounts for it. 
  • Face Cover - This slot is used for breathing aids, like gas masks, however, Radiation and Chemical pollution was not yet implemented, so it's purely cosmetic as of right now. There is a little exception - a Light Armored Mask with Armor Class 1 that will, however, not protect you too well - use face shields, that can be attached to some helmets, instead. 
  • Armband - You can equip armbands of various colors which, in theory at least, will enable you to recognize your teammates. From our experience - don't count on it and rely on accurate voice coms instead. 
  • Body Armor - Self-explanatory; Plate Carriers, Soft Armors, and Armor Vests go in this slot. Depending on the type, they protect a different number of bodyparts - Some protect Thorax only, some Thorax and Stomach, while full protection ones cover Thorax, Stomach, and Arms. Different Armors have different Movement, Turn, and Ergonomics penalties. More on Body Armors and Armor Classes later.
  • Eyewear - This might seem like another cosmetic slot, but eyewear actually reduces the size and the number of raindrops on your screen, so things like googles can be useful during bad weather. 
  • On Sling - One of two primary weapon slots. 
  • On Back - One of two primary weapon slots. 
  • Holster - A Sidearm Slot. 
  • Scabbard - A Melee weapon slot. 
  • Tactical Rig - One of the most important equipment slots. Chest Rigs serve as storage for all items you might need to access quickly, so meds, grenades, magazines, and so on. Some high-tier Tactical Rigs have A LOT of slots (up to 25). Moreover, some of them double as Body Armor, so you don't have to equip anything in the "Body Armor" slot, or even wear double protection. Armored Rigs usually have Movement, Turn, and Ergonomics Penalties. 
  • Pockets - These offer you 4 1x1 quick-access slots for grenades and smaller medical items, like Bandages or Splints. 
  • Backpack - Your main storage space for stuff that you don't need to access quickly (so loot, mainly). Backpacks can greatly vary in size (from 6 to 48 slots) and, just like all other equipment, are shown on your character which means that big and bulky backpacks can compromise your position and make hiding from enemies much harder. 
  • Pouch - This slot holds your Secure Container. Normally, all items you carry on you are lost when you are killed in a Raid; items held in the Secure Container are an exception. Put your most valuable stuff in there to avoid losing it. Standard Secure Container has only 4 slots, but you can acquire bigger ones later in the game. 

Stash

Stash is where you will be holding your loot, equipment, money, provisions, and all other things you decide to bring from a Raid. A Standard Edition of EfT provides you with a "small" 10x28 grid-size stash that can be expanded by upgrading the Stash module in your hideout (these upgrades are among the most expensive, however). Standard Edition also starts you off you with some low-tier gear, meds, and provisions. 

Small stash is one of the most limiting factors of Escape from Tarkov, especially in the end game when players have a lot of loot and resources. Complying to the below-described hints will help you alleviate the problem: 

  • Backpacks can be stacked - these can be put in one another, which means that storing an infinite amount of backpacks takes the same amount of space as storing just one (if they can fit inside one another). There is one requirement that a backpack has to meet for this to work, however: Its inner dimensions have to be the same or bigger than its outer dimensions. This means that this trick will not work with 3V G Partus 3-Day and Oakley Mechanism backpacks, but a Blackjack 50 backpack will not only work but also "create" some additional storage space for you. 
  • Every Container in your stash can be filled with stuff - backpacks that don't hold other backpacks, Tactical Vests, and other containers can be filled with things to save the stash space. 
  • Mods attached to weapons take less (or zero) space - use this to your advantage and mount your stashed mods on weapons that you don't currently use. A single firearm can be fitted with three optical devices and a flashlight, for example, and this does not increase its grid size. This method is a great way of saving some space without buying any additional expensive containers. 
  • Don't forget to fold your guns - if a firearm has a folding stock, fold it! This way it will take less space and you will fit more in your stash or a dedicated Weapon Container.
  • Detach pistol grips and magazines from guns - this will make them take one less row of space, which translates to 3 to 5 additional storage cells per firearm. This is also a great way of maximizing the efficiency of all Containers dedicated to gun storage.
  • Hoarding is a bad habit - if you have stuff that you will not use in the foreseeable future, sell it. This will free stash space for the stuff that you actually use. If an asset is easy to buy cheaply, you should not hesitate for even a moment; cash takes less space and is much more practical than twenty AK magazines... 
Gear and Stash
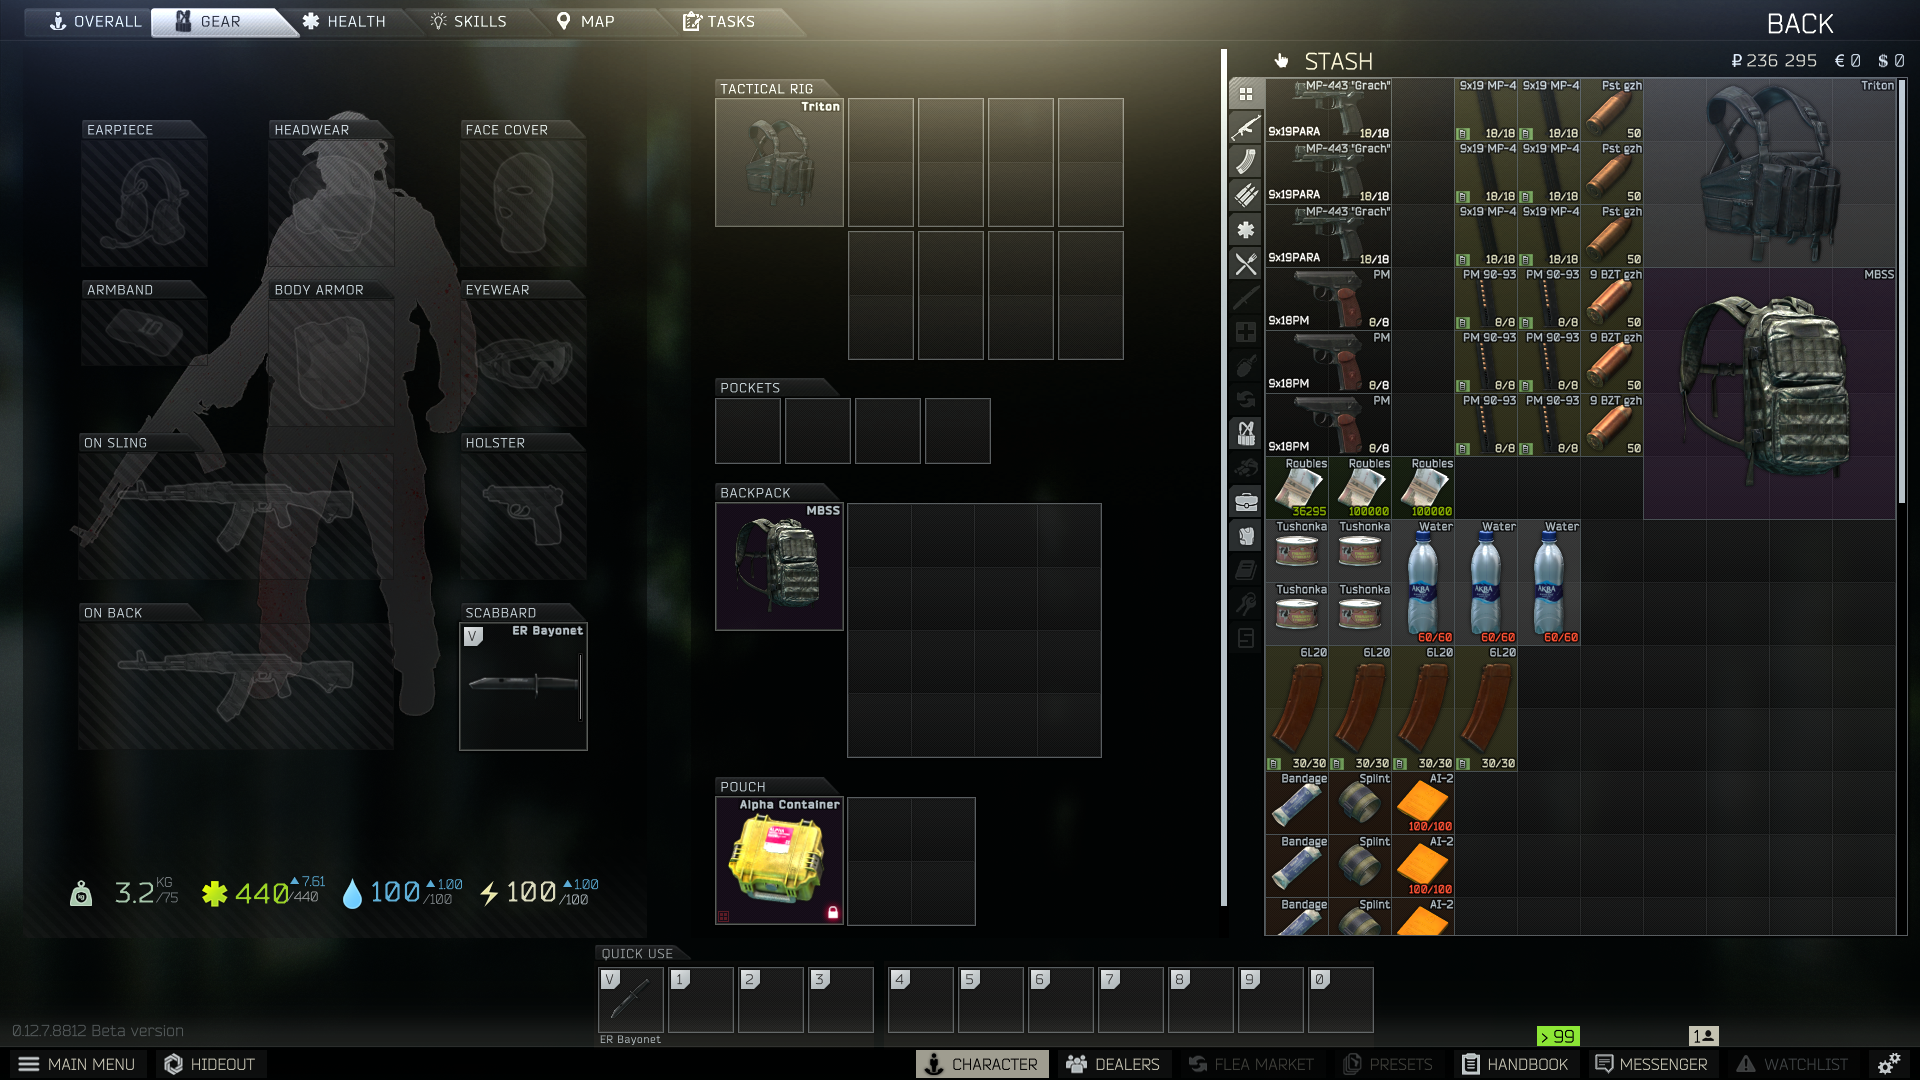
Gear and Stash in-game window you'll see after you log-in to EfT for the first time.

Hideout

Hideout is your personal hidey-hole and a safe house in the war-torn city of Tarkov. This is where you store all your loot, heal your wounds, practice combat skills, and craft some of the essential items. 

The Hideout is comprised of multiple modules (some of them have multiple levels), all of which have different effects/bonuses: 

  • Air Filtering Unit - 40% leveling boost for all Physical Skills. 
  • Bitcoin Farm - Allows you to "farm" bitcoins by using Graphics Cards. 
  • Booze Generator - Here, you can brew the "Fierce Hatchling" Moonshine. 
  • Generator - It powers all modules that require electricity. 
  • Heating - Increases Energy Regeneration Rate (and later negative effects removal rate) while your PMC remains in the Hideout. 
  • Illumination - Lights up your hideout (it's located underground, so its quite dark without the proper lighting). 
  • Intelligence Center - Reduces the cooldown of "Svav missions" available from the Scav Case module, boosts your quest rewards, and allows you to produce some "intelligence" type loot. 
  • Lavatory - this module serves as a crafting station for multiple kinds of items (including backpacks, bandages, cleaning agents, and even containers and tactical rigs). 
  • Library - 30% leveling boost for all Practical Skills and +15% additional Experience. 
  • Medstation - this module serves as a crafting station for Medical Supplies and allows your PMC's health to regenerate while he remains in the Hideout. 
  • Nutrition Unit - this module serves as a crafting station for Provisions and allows your PMC's health and Energy, and Hydration to regenerate while he remains in the Hideout. 
  • Rest Space - removes negative effects and boosts your PMC's in-Hideout Health and Energy regeneration rates. It also increases your PMC's max energy by 10 (at level 3 only). 
  • Scav Case - Allows you to send groups of Scavs on, well, scavenging missions
  • Security - Currently has no function. 
  • Shooting Range - Allows you to test your weapons inside the Hideout. 
  • Solar Power - Reduces fuel consumption by 50%. 
  • Stash - increases the size of your PMC Stash. 
  • Vents - Currently have no function. 
  • Water Collector - Boosts your PMC's Hydration Regeneration Rate while he remains in the Hideout and (at level 3) allows you to produce Purified Water. 
  • Workbench - this module serves as a crafting station for multiple types of items (Weapon Parts, Ammunition, Weapons, Technical Loot Items, Grenades, and more). It also allows you to customize your weapon off-raid. 


Currency, Flea Market, Traders, and Bartering

Escape from Tarkov features a player-driven dynamic economy that is affected not only by in-game actions but also by the real-life market changes! For example, the price of in-game Physical Bitcoin reflects the value of real-life Bitcoin. Moreover, there are several currencies available in the game and their exchange prices fluctuate constantly. To make things even more interesting, you can trade not only with money but also with multiple items found in Raid - Each Trader has a set of Barter Trades that let you exchange miscellaneous items for much more useful ones. All of this makes the game's economic system unique and engaging, especially for an online FPS. 

Currency

The main currency of Tarkov is the Rouble (₽) which is accepted by 7 out of 8 Traders; the 8th - Peacekeeper - only accepts Dollars ($). The third currency you'll find in Tarkov is Euro (€), which is mainly used for buying stuff from the Mechanic. You can earn all three currencies in multiple ways: 

  • Roubles can be looted, awarded for completing Quests, or gained by selling items to all Traders except Peacekeeper. Only 175000 Roubles can be held in your PMC inventory at a time. 
  • Dollars can be l looted, awarded by Peacekeeper by completing his Quests, or gained by selling items to him. Only 3000 Dollars can be held in your PMC inventory at a time. 
  • Euros can be looted or bought from LL2 Skier; no Trader will pay you for your loot in Euros, sadly. Only 3000 Euros can be held in your PMC inventory at a time. 

To more or less reflect the state of the real-life foreign exchange market, Currency ratios in Tarkov are changed over time. This means that you can actually lose or gain money by keeping your savings in a certain currency. 

Flea Market

Flea Market is an auction house of sorts that features all AI Trader and Player-made exchange offers - the system allows both money and items as circulating mediums, which means that you can ask for a certain thing in return for your goods, instead of money. The Flea Market had a few iterations to this day and multiple restrictions and rules were imposed on if for balance and fair play reasons; these include: 

  • Flea Market becomes available only after you achieve PMC level 10. 
  • Only Items with the "Found in Raid" status* can be sold on the Flea Market. 
  • A Tax is collected for each created offer; its exact value is calculated by a special formula that takes total offer value and some other factors into account. 
  • You can offer only 1 Item at a time but can ask for up to 3 in return. 
  • You have access to a limited amount of offer slots - raising your "Merchant Reputation"** increases your limit. At the start, you can post 1 offer; this number can rise up to 18 when you reach max Reputation. 
  • You can extend your offer's duration by clicking on the small up arrow next to the time remaining on the offer. 
  • Goods gained through successful auctions are mailed to you via Ragman, one of the in-game Traders. 

*"Found in Raid" status is given to all items you found during a Raid if you successfully extract from that Raid, but with some restrictions - You can't extract before the 10-minute mark in the Raid passes and you have to earn at least 600 experience (if you get a "Run Through" status after you extract, your found items will not count as "Found in Raid"). 

**"Merchant Reputation" is gained or lost based on your performance on the Flea Market - each successfully completed deal, and every 50K Roubles gained, increase your Reputation, while expired and removed deals decrease your Reputation. 

Traders and Bartering

Traders are the foundation of Tarkov's economy, but not only that - they are also Questgivers, and some of them are Handymen, and Medics. Each Trader has his own field of expertise and an area of interest - they buy and sell specific goods and their Quests revolve around certain aspects of life (and death) in Tarkov. As you progress through their Tasks and gain PMC levels, you will gradually unlock Traders' inventories which will give you access to more and more powerful weapons, equipment, and consumables. 

Not everything can be bought for hard currency - some deals offered by Traders require you to procure certain goods that are especially desired by them. These Barter Trades often give you earlier access to the more powerful items and gear but are also harder to make. 

If you want to know more about Tarkov Traders and Bartering, you can check out our comprehensive guide on the subject, HERE


Health, Hydration, Energy, and Status Effects

Escape from Tarkov features a full Body-Health-System aimed at simulating real-life body conditions (including pain, fractures, and bleeding), damage effects (injuries to different body parts will have different consequences), satiety, and overall physical condition. 

The overall condition of your character is described with three main parameters:

  • Health - Every body part has its own HP value and there are 7 body parts in total (Head - 35 HP, Thorax - 85 HP, Stomach - 70 HP, Arms - 60 HP each, and Legs - 65 HP each) which results in 440 total HP. If this number falls to 0, you are dead, but it's nowhere near as simple as that. If HP of your Head or Thorax falls to 0, you are also dead. If HP of any of your Arms or Legs, or Stomach falls to 0, any subsequent Damage to that body part will be distributed among all other body parts which will cripple you and, you guessed it, quickly lead to death. On top of all this, taking damage often results in gaining negative status effects (both permanent and temporary - more on that later). 
  • Hydration - This indicates how thirsty your character is. Normally, you will be able to survive an average-length Raid without drinking, but suffering critical damage to Your Stomach will cause you to dehydrate extremely quickly which is a large problem. After your Hydration reaches 0, you have ~30 seconds left before you die. To increase Hydration, simply take a drink - all non-alcoholic beverages available in the game can be used for this, and they are commonly found in Raids. 
  • Energy - This indicates how hungry your character is. Normally, you will be able to survive an average-length Raid without eating, but bleeding and/or suffering critical damage to Your Stomach will cause you rapidly loose Energy. To regain Energy during a raid, you have to eat - food can be taken with you or found during a Raid. When your Energy falls to 0, you are basically dead so try to not let it happen. 


An in-Game Health window on which all of your Character's parameters are displayed.

Status Effects

Status Effects simulate various injuries, body conditions, and the effects of using drugs. These can be divided into Body Part-Specific and General effects, and also into Temporary and Permanent (these include destroyed body parts) where Permanent Status Effects require special surgical kits to remove.

Body-Part-Specific Status Effects
Head
  • Blacked out (Destroyed); Permanent Effect - Instant death if caused by taking damage. If caused by bleeding - any subsequent damage you suffer to the Head results in death. Important: This includes damage distributed from other Blacked out limbs (so, if bleeding caused your Head to Black-out and you take damage to a Blacked-Out Stomach, for example, you're dead). 
Thorax
  • Blacked out (Destroyed); Permanent Effect - Instant death if caused by taking damage. If caused by bleeding - any subsequent damage you suffer to the Thorax results in death. Important: This includes damage distributed from other Blacked out limbs (so, if bleeding caused your Thorax to Black-out and you take damage to a Blacked-Out Stomach, for example, you're dead). 
Stomach
  • Blacked out (Destroyed); Permanent Effect - Greatly increased Energy loss and Dehydration rate. Any subsequent Damage taken to the Blacked out Stomach will be distributed to all other body parts at 1.5x rate (so, taking 10 damage to the destroyed stomach results in taking 15 damage distributed among the whole body). This condition can be removed with special Surgical kits (CMS and Surv12 - more on that later). 
Right Arm
  • Blacked out (Destroyed); Permanent Effect - 67% penalty to reloading, aiming down sights, and weapon drawing time. Searching Containers and using Items takes 50% more time. Any subsequent Damage taken to the Blacked out Arm will be distributed to all other body parts at 0.7x rate (so, taking 10 damage to the destroyed Arm results in taking 7 damage distributed among the whole body). This condition can be removed with special Surgical kits (CMS and Surv12 - more on that later). 
  • Fractured - 67% penalty to reloading, aiming down sights, and weapon drawing time. Searching Containers and using Items takes 50% more time.
Left Arm
  • Blacked out (Destroyed); Permanent Effect - 50% penalty to reloading, aiming down sights, and weapon drawing time. Searching Containers and using Items takes 67% more time. Any subsequent Damage taken to the Blacked out Arm will be distributed to all other body parts at 0.7x rate (so, taking 10 damage to the destroyed Arm results in taking 7 damage distributed among the whole body). This condition can be removed with special Surgical kits (CMS and Surv12 - more on that later). 
  • Fractured - 50% penalty to reloading, aiming down sights, and weapon drawing time. Searching Containers and using Items takes 67% more time. 
Legs
  • Blacked out (Destroyed); Permanent Effect - 45% Movement speed penalty for each Blacked out Leg and decreased jump height. Any subsequent Damage taken to Blacked out Leg will be distributed to all other body parts at 1.0x rate (so, taking 10 damage to the destroyed Arm results in taking 10 damage distributed among the whole body). This condition can be removed with special Surgical kits (CMS and Surv12 - more on that later). 
  • Fractured - 45% Movement speed penalty for each Blacked out Leg (with both your legs broken/Blacked out, your speed is reduced to a crawl) and decreased jump height. Sprinting with a broken leg (possible when under the effects of Painkillers) will cause further damage to it (the end result is its Destruction/Blacking out). 
General Status Effects
Berserk
Berserk
  • Effects - Pain resistance (an effect similar to painkillers), Increased Field of View. 
  • Accessible after reaching the Elite level of Stress Resistance Skill, can only be activated in certain circumstances. 
Bloodloss
Bloodloss
  • Effects - Every bleeding limb causes you to lose Health at a 40HP/minute rate (so, 2 separate bleeds result in 80HP/minute loss); can be removed with a Bandage and some medkits. 
  • Duration - Until treated; Damage ticks every 5 seconds. 
Contusion
Contusion
  • Effects - Muffles audio and reduces senses by 33%. 
  • Duration - 20 seconds when caused by Zarya Stun Grenade, 60s when caused by melee attacks or being shot at (if your armor stops the bullet). 
  • This effect is applied if you were within 10 meters of the Stun Grenade's explosion, when you get hit in melee, and when your armor stops incoming fire (trauma caused by the blunt force of bullet impact). 
Critical Overweight
Critical Overweight
  • Effects - Unable to Sprint, Prone movement drains Stamina, max stance height is reduced (you can't straighten up your character), stance blocks stamina regain. 
  • Duration - Permanent; can be removed by dropping some stuff (carrying too much loot is difficult sometimes). 
Overweight
Overweight
  • Effects - Jump height reduced, increased stamina drain, increased fall damage, lowered movement speed, stamina is drained while walking, the amount of noise generated is increased. 
  • Duration - Permanent; can be removed by dropping some stuff.  
Dehydration
Dehydration
  • Effects - 2 Hydration points are lost every 2 seconds, soaping filter visible on the screen. 
  • Duration - Until you take a drink, can turn into hard dehydration if hydration is not replenished in time. 
Hard Dehydration
Hard Dehydration
  • Effects - 3 Health Points are lost every 3.5 seconds on every limb, soaping filter visible on the screen. 
  • Duration - Until you take a drink. This effect will cause death if Hydration is not replenished in time. 
No icon
Disorientation
  • Effects - Your senses are disabled. 
  • Duration - 10 seconds. 
Fatigue
Fatigue
  • Effects - All performed actions take 20% more time. 
  • Duration - Permanent; can be removed by Eating/Replenishing Energy. If not removed, this turns into Hard Fatigue. 
Hard Fatigue
Hard Fatigue
  • Effects - All performed actions take 20% more time, 1 Health Point is lost every 2 seconds. 
  • Duration - Permanent; can be removed by Eating/Replenishing Energy. If not removed, it causes death. 
Overweight
Fatigue (Overweight)
  • Effects - Energy Drain is increased. 
  • Duration - Permanent; can be removed by dropping some stuff.  
No icon
Flash
  • Effects - Your character is Blinded. 
  • Duration - 10 Seconds; staring at exploding Stun Grenades turns out to not be a good idea...
Fracture
Fracture
  • Effects - Dependant on the fractured Limb (more info in the previous paragraph)
  • Duration - Permanent; Can be removed with Splints, Grizzly Medkits, and the Surv12 Surgical Kits, or circumvented for some time with Painkillers (running with a fractured leg will cause its HP to drain until it's blacked out). 
Fresh Wound
Fresh Wound
  • Effects - Gained after removing the "Blodloss" Status Effect; can turn back into Bloodloss after you perform certain actions, like Sprinting or Jumping (your wounds open again). 
  • Duration - Until your wounds open and start bleeding again (from Sprinting/Jumping) or for 240 seconds. 
On Painkillers
On Painkillers
  • Effects - Increased image contrast and sharpness (on-screen effect), your character ignores "Pain" and "Fracture" Status Effects. 
  • Duration - Dependant on the Painkiller (Analgin - 175s, Augmentin - 205s, Morphine 385s, Ibuprofen - 505s). 
Pain
Pain
  • Effects - Dark filter on-screen. 
  • Duration - varies; it may go away on its own or last until another Status Effect, like a Fracture, is cured. 
Stim Buff
Stim Buff
  • Effects - Various, depending on the type of Stimulant used (more on that in "Meds, Stimulants, and Provisions" section). 
  • Duration - Various, depending on the type of Stimulant used; can be different for effects caused by a single Stim. 
Stim Debuff
Stim Debuff
  • Effects - Various, depending on the type of Stimulant used (more on that in "Meds, Stimulants, and Provisions" section). 
  • Duration - Various, depending on the type of Stimulant used; can be different for effects caused by a single Stim. 
Stun
Stun
  • Effects - All sounds are replaced with ringing in your ears. 
  • Duration - 10 seconds. 
  • Caused by the Zarya Stun Grenade. 
Tremor
Tremor
  • Effects - Screen shaking, weapon sway while aiming is greatly increased; this Status Effect is caused by untreated "Pain" Status Effect, some Stims, and dehydration. 
  • Duration - Permanent when caused by Pain; Can be removed by treating the cause of Pain (Fracture, for example). When caused by a Stim, it depends on the type used. Tremor effect can also be removed by Ibuprofen, Morphine, Adrenalin, Golden Star, Grizzly First Aid Kit, and some Stims. 
Tunnel Vision
Tunnel Vision
  • Effects - Screen edges pulse in and out, reducing your vision, your screen becomes blurry. 
  • Duration - Varies depending on the cause (its caused by some Stimulants - more on that in the "Meds, Stimulants, and Provisions" section). 


Meds, Stimulants, and Provisions

After seeing the complexity of Tarkov's health system, the sheer number of medicaments and other consumables available in the game should not surprise you too much. These range from simple provisions, like Army Crackers, to powerful stimulants with multiple beneficial and negative effects. 

  • Meds - As the name suggests, these consumables serve to restore your hit points and cure some of the negative Status Effects. Medical Items can be devices into three main categories:
    • Drugs - Items that mainly remove pain and allow you to negate the effects of broken limbs. 
    • Injury Treatment Items - First aid equipment that will let you stop bleeding, immobilize broken limbs, and even quick perform field surgeries to restore body parts that were completely broken during an engagement. 
    • Medkits - These serve mainly to restore your health, but more advanced kinds can also remove Bleeding, or even heal Fractures, Pain, and Contusions. Each Medkit has a unique set of properties (use time, Health restored per single use, Health Pool, and the ability to remove certain Status Effects). 
  • Stimulants - These powerful combat drugs were added to the game in patch 0.12.7 and became extremely controversial right from the start. Each stimulant gives you a different set of Buffs and Debuffs that affect your character in a very strong way (for some time, certain stims even allowed you to survive headshots - luckily, that got hot-fixed quickly). Some of them increase damage resistance, some of them allow you to carry more loot, some give you almost infinite stamina, while others simply provide you with very high Skill increases. 
  • Provisions - At first glance the simplest category of consumables, but this is Tarkov so things cannot be just "simple" or "easy". Provisions restore your Energy and Hydration, except sometimes they don't - they might restore Energy, but actually lower Hydration which can be rather problematic... Moreover, some Provisions can be exchanged for various powerful Items via the barter trade system, used as crafting components, or have to be found In-Raid for certain quests. We will include only the more interesting/useful ones on our list to not bore you with stuff that serves only to replenish your Hydration/Energy - this way you'll know is something is too expensive to just eat. 
Meds
Analgin Painkillers
Analgin Painkillers
  • Adds - "On Painkillers" Status Effect for 175 seconds
  • Removes - "Pain" Status Effect 
  • Side Effects - Decreases Hydration by 7 
  • Number of Uses - 
  • Use Time - 3 seconds 
  • Very common Painkillers, available from LL1 Therapist
Augmentin Antibiotic Pills
  • Adds - "On Painkillers" Status Effect for 205 seconds
  • Removes - "Pain" Status Effect, Toxication (not yet implemented Effect)  
  • Side Effects - None 
  • Number of Uses -  1 
  • Use Time - 5 seconds 
  • A drug used to treat bacterial infections, it works like a Pain Killer. Available from Therapist LL4 
Ibuprofen Painkillers
  • Adds - "On Painkillers" Status Effect for 505 seconds 
  • Removes - "Pain" and "Contusion" Status Effects 
  • Side Effects - Decreases Hydration by 5  
  • Number of Uses - 12 
  • Use Time - 5 seconds 
  • Only available through Looting and a Barter Trade. Quite expensive, because it is a part of a Barter Trade for a THICC Items Case. 
Morphine Injector
Morphine Injector
  • Adds - "On Painkillers" Status Effect for 385 seconds 
  • Removes - "Pain" and "Contusion" Status Effects 
  • Additional Effects - Increases Energy by 10 
  • Side Effects - Decreases Hydration by 10   
  • Number of Uses - 1 
  • Use Time - 2 seconds 
  • A powerful painkiller in the form of a fast-to-use injector, it can be bought from LL4 Therapist after completing the "health Care Privacy - Part 3" Task. 
AI-2 Medkit
AI-2 Medkit
  • Adds - Health Points 
  • Removes - "Radiation Exposure" (not yet implemented Status Effect)
  • Side Effects - None 
  • Total Health Pool - 100
  • Max Health Restored per Use - 50
  • Use Time - 2 seconds 
  • The most basic First Aid Kit available in Tarkov, Available from Therapist LL1 
Car First Aid Kit
Car First Aid Kit
  • Adds - Health Points, Fresh Wound (if Bleeding was cured) 
  • Removes - "Toxication" (not yet implemented Status Effect), "Bloodloss" Status Effect 
  • Side Effects - None 
  • Total Health Pool - 220 
  • Max Health Restored per Use - 70 
  • Use Time - 3 seconds 
  • Removing the "Bloodloss" Status Effect removes 40 HP from its "Total Health Pool". Available from Therapist LL1 after completing the "Sanitary Standards - Part 1" Task 
Salewa First Aid Kit
  • Adds - Health Points, Fresh Wound (if Bleeding was cured) 
  • Removes - "Bloodloss" Status Effect 
  • Side Effects - None 
  • Total Health Pool - 400 
  • Max Health Restored per Use - 85 
  • Use Time - 3 seconds 
  • Removing the "Bloodloss" Status Effect removes 30 HP from its "Total Health Pool". Available from Therapist LL2 after completing the "Postman Pat - Part 2" Task 
IFAK Personal Tactical First Aid Kit
  • Adds - Health Points, Fresh Wound (if Bleeding was cured) 
  • Removes - "Bloodloss" Status Effect, "Toxication" and "Radiation Exposure" (not yet implemented Status Effects) 
  • Side Effects - None 
  • Total Health Pool - 300 
  • Max Health Restored per Use - 50 
  • Use Time - 3 seconds 
  • Removing the "Bloodloss" Status Effect removes 30 HP from its "Total Health Pool". Available from Therapist LL3 after completing the "Health Care Privacy - Part 1" Task 
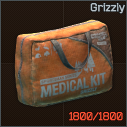
Grizzly First Aid Kit
  • Adds - Health Points, Fresh Wound (if Bleeding was cured) 
  • Removes - "Bloodloss", "Fracture", "Pain", and "Contusion" Status Effects 
  • Side Effects - None 
  • Total Health Pool - 1800 
  • Max Health Restored per Use - 175 
  • Use Time - 5 seconds 
  • Removing the "Bloodloss" Status Effect removes 30 HP from its "Total Health Pool". Removing the "Fracture" Status Effect removes 50 HP from its "Total Health Pool". Available from Therapist LL4. The most universal, the biggest, and the most expensive first aid kit in Tarkov. 
CMS Kit
CMS Kit
  • Adds - 1 Health Point to a Destroyed Body Part
  • Removes - Destroyed (Blacked Out) Body Part (Except Thorax and Head) 
  • Side Effects - Max Health of the restored Body part is capped at 45-60% of its max value (if you treat a single limb multiple times, this effect will be applied based on its CURRENT max HP) 
  • Number of Uses - 5 (restores 1 body part per use) 
  • Use Time - 16 seconds 
  • Available from Jaeger LL2 
Surv12 Field Surgical Kit
  • Adds - 1 Health Point to a Destroyed Body Part
  • Removes - Destroyed (Blacked Out) Body Part (Except Thorax and Head) and "Fracture" Status Effect  
  • Side Effects - Max Health of the restored Body part is capped at 80-90% of its max value (if you treat a single limb multiple times, this effect will be applied based on its CURRENT max HP) 
  • Number of Uses - 15 (restores 1 body part per use) 
  • Use Time - 210 seconds 
  • Available from Jaeger LL4 after completing the "Ambulance" Task. Surv12 can "revive" a Blacked Out limb and remove "Fracture" in a single application if the treated limb suffers from both conditions.   
Aseptic Bandage
Aseptic Bandage
  • Adds - "Fresh Wound" Status Effect
  • Removes - "Bloodloss" Status Effect
  • Side Effects - None
  • Number of Uses - 
  • Use Time - 2 Seconds 
  • A simple bandage, used for patching up open wounds. Available from Therapist LL1 
Army Bandage
Army Bandage
  • Adds - "Fresh Wound" Status Effect
  • Removes - "Bloodloss" Status Effect
  • Side Effects - None
  • Number of Uses - 2
  • Use Time - 2 Seconds 
  • An army-issue bandage, used for patching up open wounds.  Unlike the regular one, Army Bandage has 2 uses. Available from Therapist LL2 after completing the "Operation Aquarius - Part 2" task.  
Immobilizing Splint
Immobilizing Splint
  • Removes - "Fracture" Status Effect 
  • Side Effects - None 
  • Number of Uses - 
  • Use Time -  5 seconds 
  • A very common and simple 1-use splint used for fixing damaged bones in position. Available from Therapist LL1. 1 Immobilizing Splint is used for crafting Salewa First Aid Kit at level 1 Medstation. 

Note: Applying the Splint to your leg will render you immobile for the duration. Applying it to an arm does not prevent you from moving, however. 

Immobilizing Splint (alu)
  • Removes - "Fracture" Status Effect
  • Side Effects - None 
  • Number of Uses -
  • Use Time - 3 seconds 
  • A more advanced Immobilizing Splint that has multiple uses and can be applied 2 seconds faster than the standard one (it allows you to save time, which can save your life in combat, and inventory space - if you decide to take it into a Raid). Available from Therapist LL3 (you can also barter for it with LL2 Therapist if you provide 2x Disposable Syringe). 

Note: Applying the Splint to your leg will render you immobile for the duration. Applying it to an arm does not prevent you from moving, however. 

Vaseline
Vaseline
  • Adds - "On Painkillers" Status Effect for 500 seconds. 
  • Removes - "Pain" Status Effect 
  • Side Effects - Decreases Hydration and Energy  by 2 
  • Number of Uses - 10 
  • Use Time - 6 seconds 
  • This might seem funny but in Tarkov, Vaseline is a potent painkiller with multiple advantages - it is light, has a large number of uses per item, it's effect is long-lasting, and it takes just 1x1 inventory space. Currently, it is loot/craft (Medstation level 3) only and it's rather expensive as 2 Vaseline are needed for a Meds Case barter trade. 
Golden Star Balm
Golden Star Balm
  • Adds - "On Painkillers" Status Effect for 600 seconds. 
  • Removes - "Pain" and "Contusion" Status Effects, and not-yet-implemented "Toxication" and "Radiation Exposure" Status Effects 
  • Bonus Effects - Increases Energy by 4 and gives +1 Hydration recovery per second for 5 seconds. 
  • Number of Uses - 10
  • Use Time - 7 seconds 
  • A truly high-tier medicine, Golden Star Balm not only removes multiple harmful status effects but also increases your Energy and Hydration by a bit. Just like the Vaseline, it is light, has a large number of uses per item, it's effect is long-lasting, and it takes just 1x1 inventory space. It is currently loot-only and 1 is needed for the Propital Stimulant crafting at Medstation level 3. 
Stimulants
3-(b-TG)
3-(b-TG)
  • Use Time - 2 seconds 
  • Positive Effects - +1 Stamina Recovery Rate, +30 Strength Skill, +30 Perception Skill, +30 Attention Skill (Delay - 1s ; Duration - 240s) 
  • Negative Effects - -0.25 Energy Recovery per second (Delay - 220s ; Duration - 45s), Hands Tremor (Delay - 120s ; Duration - 120s) 
  • A powerful combat drug that affects the nervous system increasing one's attention, perception, and strength. 
Adrenaline Injector
Adrenaline Injector
  • Use Time - 2 seconds 
  • Adds - "On Painkillers" Status Effect for 65 seconds  
  • Removes - "Pain" and "Contusion" Status Effects 
  • Positive Effects - +10 Recoil Control Skill, +10 Strength Skill, +10 Endurance Skill (Delay - 1s ; Duration - 60s); +4 Health Regeneration Rate (Delay - 1s ; Duration - 15s) 
  • Negative Effects - -0.8 Energy Recovery per second, -1 Hydration Recovery per second (Delay - 50s ; Duration - 30s); -10 Stress Resistance Skill (Delay - 1s ; Duration - 60s) 
  • This Adrenal Gland hormone is commonly used as a medication in cases of anaphylaxis, cardiac arrest, and superficial bleeding. It is also known to relieve pain and temporarily boost one's endurance and strength. 
AHF1-M
AHF1-M
  • Use Time - 2 seconds 
  • Positive Effects - +5 Health Skill, Prevents Bleeding (Delay - 1s ; Duration - 60s) 
  • Negative Effects - -0.3 Hydration Recovery per second (Delay - 1s ; Duration - 120s) 
  • Military Drug developed by TerraGroup Labs as a strong coagulant dedicated for use in combat (mainly by USEC operatives). It greatly increases bleeding resistance and stops any current bleeding, moreover, it slightly improves the user's health. 
Cocktail "Obdolbos"
Cocktail "Obdolbos"
  • Use Time - 2 seconds 
  • Adds - "Pain", "Bloodloss" and "Tunnel Vision" Status Effects (Delay - 1s ; Duration - 1800s) 
  • Positive Effects - Increases Stamina Recovery Rate by 0.5, +20 Charisma Skill, +20 Stress Resistance Skill, +10 Strength Skill, +10 Endurance Skill (Delay - 1s ; Duration - 1800s) 
  • Negative Effects - +20% Damage Taken (Head is not affected), -0.05 Energy Recovery per second, -0.05 Hydration Recovery per second, -20 Attention Skill, -20 Intellect Skill, -20 Memory Skill (Delay - 1s ; Duration - 1800s) 
  • "Obdolbos" is a home-brewed stimulant created by a former TerraGroup Labs employee. Every usage of "Obdolbos" adds all of its positive effects and 5-6 random negative effects (out of the listed 9). 
Combat Stimulant Injector SJ1 TGLabs
  • Use Time - 2 seconds 
  • Positive Effects - +20 Stress Resistance Skill, +20 Strength Skill, +20 Endurance Skill (Delay - 1s ; Duration - 180s) 
  • Negative Effects - -0.3 Hydration Recovery per second, -0.25 Energy Recovery per second (Delay - 100s; Duration - 200s) 
  • This powerful combat stimulant decreases the sensation of pain and boosts the soldier's strength and endurance. It was developed by TerraGroup Labs and is allowed for use in special forces units. It should be applied before combat; has slight side effects. It can be crafted at Medstation level 2. 
Combat Stimulant Injector SJ6 TGLabs
  • Use Time - 2 seconds 
  • Adds - "Tunnel Vision" Status Effect (Delay - 200s ; Duration - 40s) 
  • Positive Effects - +2 Stamina Recovery Rate, +30 maximum Stamina (Delay - 1s ; Duration - 180s) 
  • Negative Effects - Causes Hands Tremor (Delay - 200s ; Duration - 40s) 
  • Powerful combat stimulant that increases one's constitution significantly, allowing for prolonged effort without exhaustion. Developed by TerraGroup Labs and allowed for use in special forces; has short-lasting side effects. It can be crafted at Medstation level 3. 
Hemostatic Drug Zagustin
  • Use Time - 2 seconds 
  • Removes - "Bloodloss" Status Effect 
  • Positive Effects - Prevents Bleeding (Delay - 0s ; Duration - 180s), +20 Vitality Skill (Delay - 1s ; Duration - 180s) 
  • Negative Effects - -5 Metabolism Skill (Delay - 1s ; Duration - 180s), Causes Hands tremor, -1.4 hydration Recovery per second (Delay - 170s ; Duration - 40s) 
  • This military-issue combat drug increases bloodloss resistance by increasing blood coagulation rate. While highly beneficial in combat, it eventually causes severe dehydration. Available from Therapist LL4. 
L1 (Norepinephrine)
L1 (Norepinephrine)
  • Use Time - 2 seconds 
  • Adds - "On Painkillers" Status Effect for 125 seconds  
  • Removes - "Pain" and "Contusion" Status Effects 
  • Positive Effects - +30 Maximum Stamina, +20 Strength Skill, +10 Endurance Skill (Delay - 1s ; Duration - 120s) 
  • Negative Effects - -0.45 Hydration Recovery per second, -0.45 Energy Recovery per second (Delay - 1s; Duration - 60s) 
  • A Combat Stimulant based on norepinephrine. When used, it provides a temporary boost to one's strength, endurance, and stamina while also reducing the pain. While greatly boosting user's combat capabilities, L1 also severely increases energy loss and dehydration rate which can be very detrimental in the long run. 
M.U.L.E. Stimulator
M.U.L.E. Stimulator
  • Use Time - 2 seconds 
  • Positive Effects - +50% weight limit (Delay - 1s ; Duration - 900s) 
  • Negative Effects - +9% Damage Taken (Head is not affected), -0.1 Health Regeneration rate (Delay - 1s; Duration - 900s) 
  • M.U.L.E. or "Muscular ultra-large exciter" is a stimulant designed for use before long marches; it enables the user to carry increased loads for long periods of time without tiring. Developed by TerraGroup Labs and authorized for use by special forces soldiers. This is the ultimate loot hoarder stimulant that will allow you yo carry 50% more loot than usual, just look out for its quite deadly side effects. 
Meldonin
Meldonin
  • Use Time - 2 seconds 
  • Positive Effects - +10 Strength Skill, +20 Endurance Skill, +0.5 Stamina Recovery rate, -10% Damage taken (does not affect the head) (Delay - 1s ; Duration - 900s) 
  • Negative Effects - -0.1 Hydration Recovery per second, -0.1 Energy Recovery per second (Delay - 30s; Duration - 900s) 
  • This powerful combat stimulant increases the user's constitution, strength, and endurance, but most importantly, it provides 10% damage resistance, to all body parts except the head, which may result in surviving otherwise lethal damage. Meldonin also causes long-lasting but slow energy drain and dehydration. 
P22
P22
  • Use Time - 2 seconds 
  • Positive Effects - +30 Vitality Skill, +30 Health Skill, +30 Stress Resistance Skill, -10% Damage taken (does not affect the head) (Delay - 1s ; Duration - 60s) 
  • Negative Effects - -0.8 Stamina Recovery rate, -10 Endurance Skill (Delay - 65s ; Duration - 60s) 
  • Powerful, combat stimulant developed by TerraGroup Labs. Its effects are outstanding but short-lived; while active, it greatly increases one's damage resistance and physical and psychological toughness. Its effects are more powerful than Meldonin's, but wear out 15x faster. The main side effect of the P22 is severe exhaustion after the stimulant's effects wear out. 
Propital
Propital
  • Use Time - 2 seconds 
  • Adds - "On Painkillers" Status Effect for 245 seconds (immediately), "Tunnel Vision" Status Effect   (Delay - 270s; Duration - 30s) 
  • Removes - "Pain", "Contusion" Status Effects, and "Toxication" Status Effect which was not yet introduced. 
  • Positive Effects - +1 Health Regeneration rate, +20 Vitality Skill, +20 Health Skill, +20 Metabolism Skill (Delay - 1s ; Duration - 300s) 
  • Negative Effects - Causes Hand Tremor (Delay - 270s; Duration - 30s) 
  • This military combat stimulant increases one's vitality, health, and metabolism which increases chances of survival in extreme conditions. Because of its side effects, Propital is permitted to use only by medical officers and paramedics. Available from Therapist LL3. Can be crafted at the Level 3 Medstation. 
Regenerative Stimulant Injector eTG-change
  • Use Time - 2 seconds 
  • Removes - "Contusion" Status Effect 
  • Positive Effects - +0.5 Energy Recovery per second, +6.5 Health Regeneration rate (Delay - 1s; Duration - 60s); +20 Immunity Skill, +20 Metabolism Skill (Delay - 1s ; Duration - 90s)  
  • Negative Effects - -5 Endurance Skill, -5 Health Skill (Delay - 65s; Duration - 60s); -3 Energy Recovery per second (Delay - 65s; Duration - 20s) 
  • This powerful combat stimulant greatly increases the body recovery rate and allows soldiers to survive otherwise fatal injuries. The drawback is that it leaves the user physically exhausted and starving (a side effect of highly increased metabolism). 

Provisions

Note - Many of the barter trades listed below require multiple different items - listed Provisions can be just a part of the deal and you may require quite a few of them. 

  • Can of Pacific Saury - +48 Energy, -2 Hydration; Barter Item (Attack 2 Backpack - Ragman LL3, 12x70mm DIPP ammo box - Jaeger LL4). 
  • Humpback Salmon - +50 Energy, -5 Hydration; Barter Item (5.56x45 Warmage ammo - Jaeger LL4). 
  • Can of Herring - +47 Energy, -3 Hydration; Barter Item (Mr. Holodilnick Thermobag - Jaeger LL2). 
  • Vita Juice - +8 Energy, +28 Hydration; Barter Item (Slickers Bar - Therapist LL1; such an unhealthy deal...). 
  • Bottle of Dan Jackiel Whiskey - +10 Energy, -35 Hydration; Barter Item (THICC Items Case - Therapist LL4, Modded M4A1 - Peacekeeper Ll4, Ars Arma Plate Carrier - Ragman LL3). This also removes Pain for 210s. 
  • Max Energy - +12 Energy, +20 Hydration; Barter Item (Mf-UNITAR Armor Vest - Ragman LL2). 
  • Hot Rod - +10 Energy, +20 Hydration; Barter Item (5.45x39mm BS gs ammo - Prapor LL3, Mr. Holodilnick Thermobag - Jaeger LL2). 
  • Tar Cola - +5 Energy, +15 Hydration; Barter Item (Kirasa Armor - Ragman LL2, Mr. Holodilnick Thermobag - Jaeger LL2). 
  • Slickers Bar - +30 Energy, -15 Hydration; Barter Item (Attack 2 Backpack - Ragman LL3). 
  • Pack of Sugar - +70 Energy, -45 Hydration; Barter Item (IFAK Medkit - Therapist LL2, Attack 2 Backpack - Ragman LL3, RS-32 Thermal Scope - Jaeger LL3), Crafting Item (Booze Generator - "Fierce Hatchling" Moonshine, Nutrition Unit Level 2 - Condensed Milk, Nutrition Unit Level 3 - Hot Rod).  
  • Condensed Milk - +75 Energy, -65 Hydration; Barter Item (KIBA key - Therapist LL4). 
  • Rye Croutons - +10 Energy, -10 Hydration; Barter Item (Emelya Rye Croutons - Therapist LL2), Crafting Item (Nutrition Unit Level 1 - Can of Beef Stew). 
  •  Can of Delicious Beef Stew - +50 Energy, -5 Hydration; Barter Item (5.45x39mm BT gs ammo - Prapor LL1), Crafting Item (Nutrition Unit Level 1 - Can of Beef Stew). 
  • Can of Sprats - +55 Energy, -5 Hydration; Barter Item (Heavily modded Saiga12ga - Jaeger LL3). 
  • MRE Launch Box - +70 Energy, +0 Hydration; Barter Item (Factory Exit Key (new) - Jaeger LL2). 
  • Can of Beef Stew - +45 Energy, -5 Hydration; Barter Item (AKM - Prapor LL1, Military Base Checkpoint Key - Jaeger LL2), Crafting Item (Nutrition Unit Level 1 - Iskra Launch Box). 
  • Pack of Oat Flakes - +40 Energy, -13 Hydration; Barter Item (Kiba Key - Therapist LL4), Crafting Item (Nutrition Unit Level 2 - Slickers Bar). 
  • Squash Spread - +40 Energy, +0 Hydration; Barter Item (Mr. Holodilnick Thermobag - Jaeger LL2, Heavily Modded Saiga 12ga - Jaeger LL3), Crafting Item (Nutrition Unit Level 1 - Iskra Launch Box, Nutrition Unit Level 1 - Can of Beef Stew). 
  • Alyonka Chocolate Bar - +35 Energy, -15 Hydration; Barter Item (VKBO Army Bag - Ragman LL1), Crafting Item (Nutrition Unit Level 2 - Slickers Bar, Nutrition Unit Level 2 - Pack of Sugar). 
  • Pack of Milk - +20 Energy, +30 Hydration; Barter Item (Kirasa Armor - Ragman LL2), Crafting Item (Nutrition Unit Level 2 - Condensed Milk). 
  • Iskra Launch Box - +80 Energy, +0 Hydration; Barter Item (Factory Exit Key (new) - Jaeger LL2, Bramit Silencer for Mosin - Jaeger LL3), Quest Item (5 needed for "Acquaintance" Task, 2 needed for "The Survivalist Path - Thrifty" Task). 
  • Bottle of Vodka Tarkovskaya - +0 Energy, -50 Hydration; Barter Item (ASh-12 Rifle - Prapor LL4, THICC Items Case - Therapist LL4, Weapon Case - Skier LL4, Zabralo-Sh Armor - Ragman LL4, Military Base Checkpoint Key - Jaeger LL2), Crafting Item (Laboratory Level 1 - Army Bandage, Lavatory Level 2 - Clin Wiper). This also removes Pain for 250s. 
  • Water Bottle with a filter Aquamari - +20 Energy, +350 Hydration; Barter Item (6h5 Bayonet - Prapor LL3, AnA Tactical Rig - Ragman LL3, FLIR Thermal Scope - Jaeger LL3, Heavily Modified Saiga 12ga - Jaeger LL3, 9x19mm DIPP ammo box - Jaeger LL4).
  • "Fierce Hatchling" Moonshine - +20 Energy, -10 Hydration; Barter Item (THICC Items Case - Therapist LL4, Weapon Case - Skier Ll4, GPNVG-18 Night Vision - Peacekeeper LL3, Zabralo-Sh Armor - Ragman LL4), Crafting Item (Nutrition Unit Level 3 - Bottle of Vodka Tarkovskaya). 
  • Purified Water - +25 Energy, +100 Hydration; Barter Item (RB-AK Key - Therapist LL3), Crafting Item (Booze Generator - "Fierce Hatchling" Moonshine, Nutrition Unit Level 3 - Water Bottle with a filter Aquamari, Nutrition Unit Level 3 - Hot Rod). 
  • Army Crackers - +10 Energy, -5 Hydration; Crafting Item (Nutrition Unit Level 1 - Iskra Launch Box, Nutrition Unit Level 2 - Slickers Bar). 
  • 0.6L Water Bottle - +0 Energy, +55 Hydration; Crafting Item (Nutrition Unit Level 2- Max Energy, Nutrition Unit Level 3 - Bottle of Vodka Tarkovskaya, Lavatory Level 2 - Schaman Shampoo). 


Armor, Weapons, and Ammunition

All weapon and armor ballistics are modeled as realistically as possible in Tarkov. Bullets drop off over distance because they are affected by gravity and air friction. They can penetrate objects or ricochet right off them (this depends on the impacted material), they might even fragment (which will cause extra damage if the fragmentation happens after the bullet penetrates the player's armor). As a bullet travels through the air, it gradually loses its velocity and, because of that, its armor penetration capabilities. If a bullet is stopped by armor, you will only take minor blunt damage, but if it manages to penetrate, you will be in a world of hurt. 

Armor

There are 6 Armor Classes in the game, starting from Class 1 (the weakest) and leading up to Class 6 (the strongest). While Class 1 Armor will only stop basic buckshot, Class 6 is able to withstand everything except specialized Armor-Piercing ammunition. All Armors have their durability*; if a bullet is stopped by the armor, it looses some of it (the exact amount depends on the bullet's damage and armor damage % values). After the durability is reduced low enough, the armor stops to function and you receive full damage from all subsequent hits. 

What happens after the Armor is struck by a bullet is determined by its Armor Class and the bullet's penetration power. Overall, a bullet that has at least 45 penetration power will penetrate Class 6 Armor without too much of a problem (depending on the bullet type - 2 to 5 hits; this is a very rough estimate, of course).

*Damaged Armors can be repaired with the help of Traders, but each repair reduces the maximum durability of the repaired armor. Moreover, depending on the material they're made of, some armors lose more max durability after repair (ceramic armors are more fragile and harder to repair overall). 

Note: As a general rule, you can assume that Class 3 Armor is enough to protect you against most Scavs, but you will need at least Class 5 Armor to have a chance against ammunition used by most players (this leaves Class 4 Armor in a rather peculiar spot). 

If you want to learn more about Tarkov's ballistics and check Damage and Armor Penetration values of every ammunition type available in the game, check out our Tarkov Ammo Chart, HERE

Weapons

There are over 80 Weapons available in Escape from Tarkov, and this number rises with every patch. While some of them are less powerful than others, any weapon is a lethal tool when loaded with appropriate ammunition and held by a skilled PMC. Every weapon has a set of characteristics, which include: 

  • Horizontal and Vertical recoil - this determines how much the weapon will move vertically and horizontally when firing. The less the better. 
  • Effective Distance - the maximum range at which it is possible to land consecutive hits with the given firearm. 
  • Ergonomics - overall handling of the weapon. This affects ADS (aiming down sights) speed, amount of noise generated when ADSing, and the stamina drain while ADSing. 

Recoil and Ergonomics values of almost every weapon can be fine-tuned by replacing parts. In Tarkov, all weapons are modular and there are hundreds of weapon parts and attachments available. Some of the parts are extremely expensive, however, and it is not uncommon to have parts that outvalue the weapon itself.

If you're interested, we have made a separate guide on the budget weapons and modding, it will help you make your starting weapons more reliable without spending a fortune. You can check it out HERE

Ammunition

Choosing appropriate ammunition is the most important thing when it comes to combat effectiveness in EfT. Even the most advanced and highly-modded weapon will not be effective if loaded with terrible ammunition. When you are new to the game, or there was a wipe and you only have access to Level 1 Traders, your options are rather limited. Here is a shortlist of the most reliable ammunition types available right from the start (if there aren't any available for a given caliber, we'll skip it): 

  • 12/70 Shotgun - 12x70 7mm Buckshot; deals high damage to flesh, aim at the legs. Available from Prapor, Skier, and Jaeger. 
  • 20/70 Shotgun - 20/70 Slug "Poleva-3"; it has weak penetration but deals high damage and it has an accuracy boost, aim at the legs. Available from Jaeger. 
  • 9x18mm Makarov - 9x18mm PM Pst gzh; not really effective, but there is nothing better at LL1. Available from Prapor. 
  • 9x19mm Parabellum - 9x19mm Pst gzh; surprisingly effective against most early face shields, aim at the legs when against heavily-armored targets. Available from Mechanic. 
  • 7.62x25mm Tokarev - 7.62x25mm TT LRN; a "leg meta" ammo, aim for unarmored legs. Available from Jaeger. 
  • 4.6x30mm - 4.6x30mm Action SX; rather irrelevant at the start, as you will not have access to MP7 early (leg meta ammo). Available from Mechanic. 
  • .366 TKM - .366 TKM FMJ; the only choice, aim at legs against armored targets. Available from Skier and Jaeger. 
  • 5.45x39mm - 5.45x39mm PS; the best available, but it still is not "good". 5.45x39mm AKs become viable later, really. Available from Prapor after completing the task "Delivery from the past". 
  • 5.56x45mm NATO - 5.56x45mm M855; this goes through Class 3 Armor in 1 hit. Available from Peacekeeper. 
  • 7.62x39mm - 7.62x39mm PS; one of the best ammo types available at the start. 7.62x39mm weapons are among the most viable in the early game because of this ammunition. Available from Prapor. 
  • 7.62x51mm NATO - 7.62x51mm TPZ SP; quite effective early, but at the cost of reduced accuracy. Available from Jaeger. 
  • 7.62x54mmR - 7.62x54R LPS gzh; extremely lethal projectile, with 42 penetration and 81 Damage it will 2-shot people wearing Class 4 Armor. 

If you are interested in a detailed breakdown of the ammo available in the game, we encourage you to check out our comprehensive guide on ammunition, it includes our top 3 choices of ammo for each caliber - available HERE


Your first Raid

Let us face it, you will most likely not survive your first couple of Raids. Escape from Tarkov is brutal for new players; you will be thrown straight into the blender together with experienced veterans who will have every advantage on you... luckily, there are a few things you can do to prepare yourself (to some extent) and speed up the learning process.  

Tips and Tricks

  • Offline Mode - you might have heard about this many times before, but we'll say it again; Playing in Offline Mode is, by far, the best way to learn the maps. Don't go into a live Raid unless you already played a few offline hours on it - learning loot spawns and extracts is a bare minimum. 
  • Have a good map opened somewhere - there are great loot maps, of every Tarkov area, available on the official wiki. Always have the relevant map opened during a Raid (on a second monitor, phone, tablet, or even in your browser). These 3rd party maps are 100 times better than the in-game ones - use them. 
  • Be prepared to die - your survival rate is not likely to be higher than 40%, even if you are a skilled player - always expect to die and lose all your equipped gear and carried loot. 
  • Do not over-equip yourself - "gear fear" is a common term in Tarkov; don't wear equipment that is too expensive for you to replace. Even if you loot something great - sell it and use the money to create a couple of more budget loadouts, as doing this will ensure that you won't despair too much when you die. 
  • Learn the controls well - this is obvious, but you will forget how to check your ammunition while under stress - practicing and "playing" with controls in the offline mode is a good way to familiarize yourself with them. 
  • Make an effort to memorize Penetration Values of different ammo types - you might load ammunition you know before a Raid, but sooner or later you will be forced to use a looted gun; better to know how the ammunition, it's loaded with, will perform. 
  • Know where to aim with the ammunition you're currently using - some ammo types have low penetration and high damage - aim at legs when using these; there is no armor available in Tarkov that would protect one's legs. 
  • Tasks are the best source of experience - by completing tasks, you will level up the fastest. Not only that, but you will also increase Trader's reputation and gain access to higher tiers of equipment faster. Try to prioritize maps you have active objectives on. 
  • Scav Runs age good, but... - If you are completely broke, Scav runs will help you build up some economy. Don't prioritize them, however, as they don't develop your PMC character at all (no experience, no skill increases, nothing). 
  • Prioritize one map and perfect your loot runs on it - this will allow you to make money quickly and get to the best loot on a given map before anyone else gets to it. To do this well, you have to know the map inside out. Customs is regarded as the most "beginner-friendly" map (beginner-friendly in Tarkov terms, so still extremely tricky, but less so than the others). 


END NOTE

The learning curve in Tarkov is steep, to say the least. We hope that this guide will help you learn the game and allow you to avoid at least some of the confusion associated with Tarkov's brutal gameplay. 

We hope that you have found this guide useful and informative. We will be happy to receive constructive criticism that will help us improve our future work so leave your suggestions in the comments section below. 

Pictures used in this article are the intellectual property of the Battlestate Games.