Kinetic Bolt of Fragmentation
Deadeye Build
Updated for Patch 3.23
The Best Crafty Guides by Odealo
| Guide notes |
January 10, 2024
-Build created |
| Build Overview |
| Tags: [ELEMENTAL] [RANGED] [LIFE] |
|
Budget:
Defenses:
|


|
Boss DPS:
AoE:
|


|
Kinetic Bolt of Fragmentation is the alternate version of Kinetic Bolt that has lower damage but enables the "shotgun" effect for its secondary Projectiles so we're capitalizing on it big time by converging all the Projectiles into a single spot, right where the enemy is. The secondary Projectiles are created each time the main Projectile changes direction, which it does two times, or when interacting with enemies (by Piercing, Forking, Chaining, Splitting, or Hitting them). To generate a lot of these Projectiles simply invest in additional Projectiles from passives or Dying Sun Flask. It's the most efficient way to improve your damage against single targets. Another major improvement in this department is brought by Sniper's Mark and Focal Point Passive - This Mark Splits your Projectiles, multiplying their number. Split is the most prioritized Projectile interaction which comes before Forking, Chaining, and such, so you're guaranteed to spawn the most Projectiles during boss fights. To cause all of these to Hit the same enemy, you need a Returning Projectiles Support Gem or Nimis Ring - Projectiles will return back to you. By standing on top of your target they will all damage it. This damage is improved by Far Shot as Returning Projectiles have traveled a fair distance.
Deadeye is an obvious choice on account of the already mentioned passives - Far Shot, Focal Point, and Endless Munitions for two more Projectiles. Gathering Winds improves mobility and DPS with a powerful Tailwind Effect. The Action Speed granted by it is immensely potent. The build is also a Power Charge stacker. The new Ralakesh's Impatience Boots will keep you at Maximum Charges, and while we're at it, Badge of the Brotherhood, Graven's Secret, and Malachai's Loop seem like the best-in-slot items to expand on this Charge gimmick. It's a ton of Elemental Recoup, Crit Chace, and Attack Speed. The last piece of the puzzle is a good Wand. There you will simply need some flat Damage with local modifiers to Attack Speed, Elemental Penetration, or Critical Strikes. The end result is a build with a lot of Damage, great mobility, and excellent clear speed, but low durability. It is especially vulnerable to big Physical Damage Hits as we have no Armour at all. The abundant Evasion Rating, Spell Suppression, Life Recoup, and Life Leech are still very high and it's usually enough to protect you from dying too often during mapping.
You can also check our other Path of Exile builds right over here Odealo's Crafty Guides - Full List
1. Gameplay
Use Kinetic Bolt against all manners of foes. If fighting bosses, stand as close to them as you can to maximize your DPS. To move around you can use pretty much any mobility Skill but Frostblink seems like the best option with Badge of the Brotherhood on. Your one temporary Aura is Haste and it's activated via Guardian's or Divine Blessing Support. Your other Auras are Wrath, Grace, and Precision. Immortal Call and Sniper's Mark should be triggered automatically.
|
 
Odealo is a secure trading platform for MMO gamers. Here you can buy, sell, and trade PoE Currency for real cash.
|
2. Build's PROS & CONS
| PROS |
- very high damage against all types of bosses
- excellent clear speed due to Gathering Winds and many Projectiles
|
| CONS |
- vulnerable to Physical Hit Damage
- can be expensive to assemble
|
3. Leveling tips
Follow our Ranger Leveling Guide - Classic Bow version. Wands are not that good to level up with, use Bows instead. Swap to Kinetic Bolt after acquiring all the mandatory Unique items like Nimis and Ralakesh's Impatience.
Bandits:
You should kill all three Bandits for two additional Skill Points. Ailra can be great too if you struggle with Elemental Resistances.
4. Final Skill Tree, Ascendancy Points, and Pantheon
Final Skill Tree:
118 Points Final Skill Tree (doesn't include Unique or Cluster Jewels)
118 Points Path of Building (PoB) link
Ascendancy points:
Preferably in that order:
- Gathering Winds
- Far Shot
- Endless Munitions
- Focal Point
Pantheon:
Major God: Soul of Lunaris: 1% increased Movement Speed for each nearby Enemy, up to 8%; 1% additional Physical Damage Reduction for each nearby Enemy, up to 8%
Minor God: Soul of Abberath: 60% less Duration of Ignite on You
5. Final Gems links
| [DPS] Kinetic Bolt setup |
 |
Kinetic Bolt of Fragmentation - It has lower damage and fires fewer Projectiles than the original, but it excels at killing bosses. It's affected by Spell Damage modifiers despite being an Attack. |
 |
Volatility Support - You're dealing mostly Lightning Damage which has a wide damage range. It's where the extra Maximum Damage from Volatility will be especially good. It's even better if your damage is Lucky. |
 |
Fork Support - Use it to cause your Projectiles to Fork and Hit more enemies.  Elemental Damage with Attacks Support is better in terms of damage. Elemental Damage with Attacks Support is better in terms of damage. |
 |
Lightning Penetration Support - Damage Penetrates a big chunk of Lightning Resistance. |
 |
Increased Critical Damage Support - Increases Critical Strike Multiplier. |
 |
Power Charge on Critical Support - Grants Power Charge on Critical Strike (Absorption Charges in our case), and more Damage per Power Charge. |
| [UTILITY] Auras setup |
 |
Wrath - Adds Lightning Damage to Attacks and grants more Spell Lightning Damage for your Kinetic Bolt. |
 |
Grace - Adds and increases Evasion Rating to Evade incoming Attacks. |
 |
Precision - Adds Accuracy Rating and Increases Critical Strike Chance. |
 |
Enlighten Support - Linked Spells Reserve less Mana. |
| [UTILITY] Temporary Aura setup |
 |
Haste - Use it as a temporary Aura to boost your Movement and Attack Speed. |
 |
Raise Spectre - Dark Marionette Spectre is a self-re-summoning Minion that can host your Haste Aura. |
 |
Meat Shield Support - Spectres will stay close to your character so that it will benefit from Haste. |
 |
Guardian's Blessing Support - Cast it on a Minion to host linked Aura. The Minion will take a lot of Damage because of that. You can also go for the regular Eldritch Battery and Divine Blessing combo given you have enough Energy Shield. |
| [UTILITY] Immortal Call setup |
 |
Immortal Call - Vastly reduces Physical and Elemental Damage taken for a brief moment. |
 |
Cast when Damage Taken - Triggers linked Spell after taking a certain amount of damage. |
| [MOBILITY] Frostblink |
 |
Frostblink - A simple mobility Spell to travel faster and dodge attacks.  Shield Charge can also be used instead. Shield Charge can also be used instead. |
| [UTILITY] Sniper's Mark setup |
 |
Sniper's Mark - Marked enemy receives increased Projectile Damage, and Projectiles Hitting them Split on impact. |
 |
Mark on Hit Support - Sniper Mark is applied automatically on Hit against Rare and Unique Enemies, be it on a low Cooldown. |
 |
Lifetap Support - Mark costs Life instead of Mana which you don't have a lot of. |
| [UTILITY] Berserk |
 |
Berserk - Optional choice if you have one extra Gem Socket and a way to generate Rage. It enhances the Rage effect on you for a short while. |
|
On Odealo dozens of sellers compete for your attention. Buying PoE Currency here guarantees the best prices, prompt delivery, and the best quality of service.
|
6. Gear Setup
This specific variant of the build utilizes Power Charges alongside unique Malachai's Loop, Ralakesh's Impatience, Graven's Secret, and Badge of the Brotherhood. Nimis is a ring we deem mandatory too, you don't want to use a Support Gem in your Kinetic Bolt setup instead of it. Replica Hyrri's Ire is another unique item that is probably the best pick for this build. It leaves you with a Wand, Ring, and Gloves of Rare quality. These should be enough to cap your Resistances, get you enough Accuracy for 100% Hit Chance, and provide you with sufficient Attributes. After that's done, look for Attack Speed, Added Lightning Damage, and Critical Strike modifiers. We have also used Dance with Death and you can't use Helmet with that Keystone. It is however optional, you will probably need it for Resistances. To improve your durability look for Spell Suppression Chance and Evasion Rating.
Our recommended items will:
- Cap your resistances at 75%
- Provide you with enough DPS and Life to start mapping
|
Stat priorities on items:
- Elemental Resistances
- Maximum Life
- enough Accuracy
- Maximum Power Charges
- Added Lightning Damage to Attacks
- Critical Strike Chance
- Spell Damage
- Spell Suppression
- Reduced Mana Cost of Skills
- Strength
- Chaos Resistance
- Critical Strike Multiplier
- Evasion
- Physical Damage mitigation
|
 (Helmet) Rare Helmet- Our version of this build uses no Hemet due to the Dance with Death Keystone, but you may want to wear one still to gain various defensive and offensive mods listed here. (Helmet) Rare Helmet- Our version of this build uses no Hemet due to the Dance with Death Keystone, but you may want to wear one still to gain various defensive and offensive mods listed here. |
Min. requirements:
+60 to Maximum Life
+30% to Elemental Resistances
Optional affixes:
Nearby Enemies have -9% to Lightning Resistance
Physical Damage from Hits taken as Fire Damage
Chance to Suppress Spell Damage
Chaos Resistance |
 (Weapon) Rare Wand - Get a Want with a lot of increased Spell Damage, Attack Speed, Added Lightning Damage, and Lighting Penetration. Critical Strike mods would be great too. (Weapon) Rare Wand - Get a Want with a lot of increased Spell Damage, Attack Speed, Added Lightning Damage, and Lighting Penetration. Critical Strike mods would be great too. |
Min. requirements:
15% increased Attack Speed
Attacks with this Weapon Penetrate 15% Elemental Resistances
Adds Lightning Damage
50% increased Spell Damage
Optional affixes:
increased Critical Strike Chance |
 (Off-hand) Malachai's Loop - Used for two additional Maximum Power Charges with no downside on account of Ralakesh's Impatience Boots. It increases SPell Damage per Power Charge and grants some extra ES. (Off-hand) Malachai's Loop - Used for two additional Maximum Power Charges with no downside on account of Ralakesh's Impatience Boots. It increases SPell Damage per Power Charge and grants some extra ES. |
(10-15)% increased Spell Damage
(210-250)% increased Energy Shield
+2 to Maximum Power Charges
20% chance to gain a Power Charge on Hit
(12-16)% increased Spell Damage per Power Charge
Lose all Power Charges on reaching Maximum Power Charges
Shocks you when you reach Maximum Power Charges |
 (Off-hand) Rathpith Globe - This Shield is good if you have a somewhat high Maximum Life. You will sustain the Life drain with instant Life Leech mastery. It grants a lot of Crit Chance and Spell Damage, which is 200% as effective on Kinetic Blast. (Off-hand) Rathpith Globe - This Shield is good if you have a somewhat high Maximum Life. You will sustain the Life drain with instant Life Leech mastery. It grants a lot of Crit Chance and Spell Damage, which is 200% as effective on Kinetic Blast. |
(10-15)% Chance to Block Spell Damage
(120-160)% increased Energy Shield
10% increased maximum Life
Sacrifice 10% of your Life when you Use or Trigger a Spell Skill
5% increased Critical Strike Chance for Spells per 100 Player Maximum Life
5% increased Spell Damage per 100 Player Maximum Life |
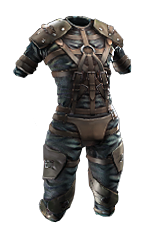
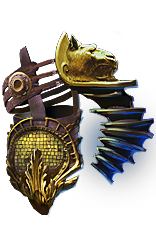 (Body Armour) Replica Hyrri's Ire - It's what we deem the best Armour. It's perfectly suited for this build with its added Lightning Damage and tons of Suppression. (Body Armour) Replica Hyrri's Ire - It's what we deem the best Armour. It's perfectly suited for this build with its added Lightning Damage and tons of Suppression. |
(140-220)% increased Evasion Rating
(12-18) to (231-347) Added Lightning Damage with Wand Attacks
25% increased Shock Duration on Enemies
+(40-50) to Intelligence
+30% chance to Suppress Spell Damage |
 (Body Armour) Rare Body Armour - You can wear a Rare Body Armour too if you strive for more Maximum Life, Elemental Resistance, lower Mana Cost of Skills, or higher Critical Strike Chance. (Body Armour) Rare Body Armour - You can wear a Rare Body Armour too if you strive for more Maximum Life, Elemental Resistance, lower Mana Cost of Skills, or higher Critical Strike Chance. |
Min. requirements:
+70 to maximum Life
+50% to Elemental Resistances
Optional affixes:
Socketed Attacks have -15 to Total Mana Cost
Attacks have +#% to Critical Strike Chance
You can apply an additional Curse
Chance to Suppress Spell Damage |
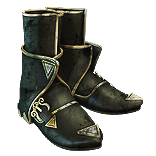
 (Boots) Ralakesh's Impatience - We have used these Boots to be always on maximum Power, Frenzy, and Endurance Charges as they're all influential in this build. (Boots) Ralakesh's Impatience - We have used these Boots to be always on maximum Power, Frenzy, and Endurance Charges as they're all influential in this build. |
+(15-25)% to Cold Resistance
+(15-25)% to Chaos Resistance
30% increased Movement Speed
Count as having maximum number of Endurance Charges
Count as having maximum number of Frenzy Charges
Count as having maximum number of Power Charges |
 (Boots) Rare Boots - You can use Rare Boots if you have a reliable source of Frenzy and Power Charges, and it would require you not to use Malachai's Loop or Graven's Secret. Look here for Movement Speed, Suppression Chance, and basic defensive stats with Ekdritch Implicits for Brittle Ground, Cooldown Recovery Rate for Movement Skills, or chance to Avoid Elemental Ailments. (Boots) Rare Boots - You can use Rare Boots if you have a reliable source of Frenzy and Power Charges, and it would require you not to use Malachai's Loop or Graven's Secret. Look here for Movement Speed, Suppression Chance, and basic defensive stats with Ekdritch Implicits for Brittle Ground, Cooldown Recovery Rate for Movement Skills, or chance to Avoid Elemental Ailments. |
Min. requirements:
+60 to maximum Life
25% increased Movement Speed
+50% to Elemental Resistances
Optional affixes:
Chaos Resistance
chance to gain Onslaught for 4 seconds on Kill
chance to gain Elusive on Critical Strike
Increased Cooldown Recovery Rate
Chance to Suppress Spell Damage |
 (Gloves) Rare Gloves - Go for Maximum Life, Resistances, SPell Suppression, and Attack Speed here. Added Lightning Damage, extra Evasion, Accuracy, and Chaos Resistance are great additions. For Elritch mods get increased Attack Speed, Rage on Hit, or increased Effect of Marks. (Gloves) Rare Gloves - Go for Maximum Life, Resistances, SPell Suppression, and Attack Speed here. Added Lightning Damage, extra Evasion, Accuracy, and Chaos Resistance are great additions. For Elritch mods get increased Attack Speed, Rage on Hit, or increased Effect of Marks. |
Min. requirements:
70 maximum Life
40% Total Elemental Resistances
Spell Suppression Chance
Optional affixes:
Life Regeneration
Chaos Resistance
Accuracy Rating
Added Lightning Damage to Attacks
increased Attack Speed |
 (Belt) Graven's Secret - You're able to generate Absorption Charges to Recoup Elemental Damage as Life which is a potent defensive layer. The extra Maximum Power Charge and a lot of Lightning Resistance are extremely fitting in this build. (Belt) Graven's Secret - You're able to generate Absorption Charges to Recoup Elemental Damage as Life which is a potent defensive layer. The extra Maximum Power Charge and a lot of Lightning Resistance are extremely fitting in this build. |
+(60-70) to maximum Energy Shield
(16-20)% increased maximum Mana
+(40-60)% to Lightning Resistance
+1 to Maximum Power Charges
Modifiers to Minimum Power Charges instead apply to Minimum Absorption Charges
Maximum Absorption Charges is equal to Maximum Power Charges
Gain Absorption Charges instead of Power Charges |
 (Amulet) Badge of the Brotherhood - As you have a lot of Frenzy Chargers, this Amulet seems like one of the strongest options. Frenzy Charges will improve your DPS, and the Cooldown Recovery Rate will enhance your Frostblink. (Amulet) Badge of the Brotherhood - As you have a lot of Frenzy Chargers, this Amulet seems like one of the strongest options. Frenzy Charges will improve your DPS, and the Cooldown Recovery Rate will enhance your Frostblink. |
+(16-24) to Dexterity and Intelligence
(7-10)% increased Cooldown Recovery Rate of Travel Skills per Frenzy Charge
(7-10)% increased Effect of Elusive on you per Power Charge
(20-25)% chance to lose a Frenzy Charge when you use a Travel Skill
(20-25)% chance to lose a Power Charge when you gain Elusive
Your Maximum Frenzy Charges is equal to your Maximum Power Charges |
Recommended Anointments:
Overcharge
Lethality
Sovereignty
Cleansed Thoughts |
 (Ring) Nimis - Nimis causes your Projectiles to return to you and it's far better than the Returning Projectiles Support Gem, which lowers the damage of returning Projectiles by 60%. (Ring) Nimis - Nimis causes your Projectiles to return to you and it's far better than the Returning Projectiles Support Gem, which lowers the damage of returning Projectiles by 60%. |
+(20-30)% to Lightning Resistance
+(30-50) to Dexterity
(25-35)% increased Projectile Damage
Projectiles Return to you
Projectiles are fired in random directions |
 (Ring) Rare Ring - Look for Maximum Life, increased Elemental Damage, Attributes (especially Strength), Resistances, Accuracy, Added Lightning Damage, and reduced Mana Cost of Skills if needed. (Ring) Rare Ring - Look for Maximum Life, increased Elemental Damage, Attributes (especially Strength), Resistances, Accuracy, Added Lightning Damage, and reduced Mana Cost of Skills if needed. |
Min. requirements:
50 maximum Life
increased Elemental Damage with Attacks
Non-channelling Skils have -# to Total Mana Cost (crafted)
Optional affixes:
Elemental and Chaos Resistances
Attributes
Accuracy
Adds Lightning Damage to Attacks
Conductivity on Hit (if able to apply two Curses) |
 (Jewel) Rare Jewels - On your Jewels try to get increased Maximum Life, missing Attributes and Resistances, Attack Speed, and Critical Strike Chance with Crit Multiplier. Added Lightning Damage can be found on Searching Abyss Jewels. (Jewel) Rare Jewels - On your Jewels try to get increased Maximum Life, missing Attributes and Resistances, Attack Speed, and Critical Strike Chance with Crit Multiplier. Added Lightning Damage can be found on Searching Abyss Jewels. |
Recommended affixes:
Attributes
Resistances
increased Maximum Life
increased Attack Speed
Critical Strike modifiers
Chance to Avoid Elemental Ailments
Added Lightning Damage with Wand Attacks (Searching Abyss Jewels) |
 (Jewel) Brutal Restraint - Dance with Death causes your Hits to be Lucky which is good with your low Minimum and high Maximum Damage. It also causes your Crit Chance to be lucky and it is helpful if you don't have it capped at 100%. The downside - an inability to wear a Helmet and taking more Damage from Critical Strikes is hindering so you may consider not using it after all. (Jewel) Brutal Restraint - Dance with Death causes your Hits to be Lucky which is good with your low Minimum and high Maximum Damage. It also causes your Crit Chance to be lucky and it is helpful if you don't have it capped at 100%. The downside - an inability to wear a Helmet and taking more Damage from Critical Strikes is hindering so you may consider not using it after all. |
Denoted service of (500-8000) dekhara in the akhara of Asenath
Passives in radius are Conquered by the Maraketh
Historic |
 (Jewel) Ancestral Vision - It's good if your Spell Suppression is capped at 100%. You can then gather the remaining 50% Chance to Avoid Elemental Ailments from your Boots or Jewels. (Jewel) Ancestral Vision - It's good if your Spell Suppression is capped at 100%. You can then gather the remaining 50% Chance to Avoid Elemental Ailments from your Boots or Jewels. |
+(5-10) to Dexterity
Modifiers to Chance to Suppress Spell Damage also apply to Chance to Avoid Elemental Ailments at 50% of their Value |
 (Jewel) Watcher's Eye - Lightning Penetration, Attack Speed, and Critical Strike mods from Wrath, Haste, and Precision are of great value. Grace offers some defensive perks on this Jewel. (Jewel) Watcher's Eye - Lightning Penetration, Attack Speed, and Critical Strike mods from Wrath, Haste, and Precision are of great value. Grace offers some defensive perks on this Jewel. |
(4-6)% increased maximum Energy Shield
(4-6)% increased maximum Life
(4-6)% increased maximum Mana
<Two or Three random aura modifiers> |
 (Flask) Dying Sun - The two additional Projectiles from this Flask are undoubtedly a major boost to your damage. (Flask) Dying Sun - The two additional Projectiles from this Flask are undoubtedly a major boost to your damage. |
+50% to Fire Resistance
20% less Fire Damage taken
(125-150)% increased Charges per use
(60-40)% less Duration
(10-20)% increased Area of Effect during Effect
Skills fire 2 additional Projectiles during Effect |
|
Other suggested Flasks:
- Diamond Flask with increased Critical Strike Chance
- Jade Flask with increased Attack Speed
- Silver Flask with Reduced Mana Cost of Skills (crafted)
- Life Flask with Bleed Immunity
|
    |
|
Odealo is one of the biggest Path of Exile marketplaces. It allows regular players to buy, sell, and trade PoE Currency with the use of real cash
|
If you have any other build requests please leave that in the comments below. We are always open to suggestions and constructive feedback.
Pictures used in this article are the intellectual property of Grinding Gear Games.